
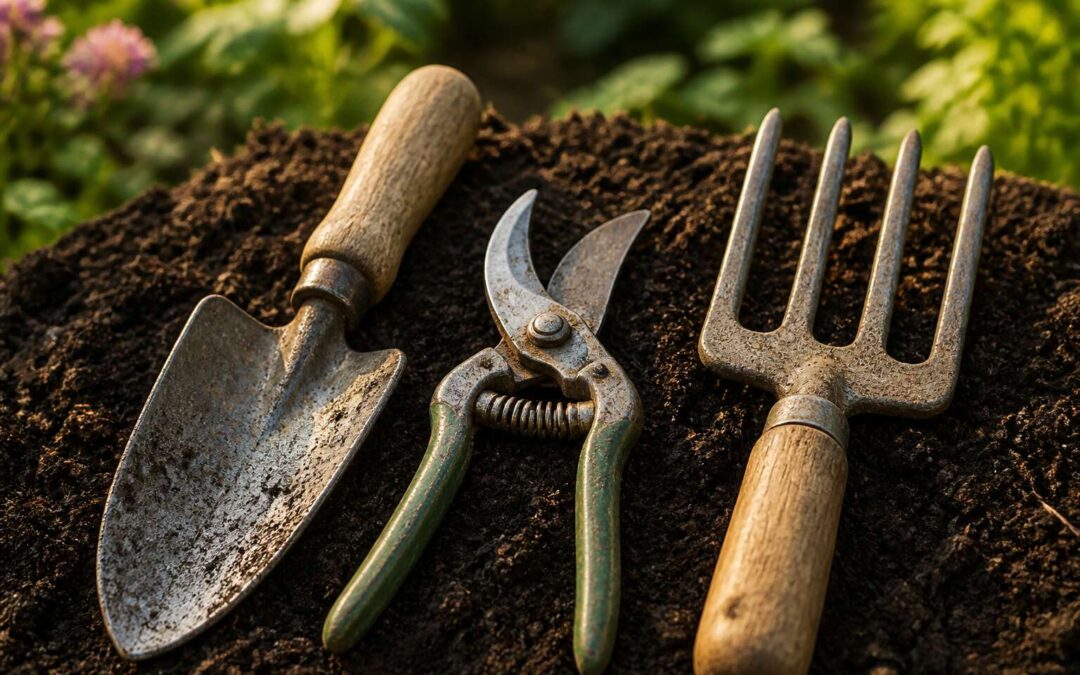
The Indispensable Hand Trowel
Selecting the Perfect Blade Material
Nearly every gardener owns one, yet few consider the metallurgy beneath their fingers. The hand trowel is the workhorse among the 3 garden tools that matter most, and its blade material determines whether it serves for decades or fails within a season.
Carbon steel offers superior strength and takes a sharp edge, but it demands care. In South Africa’s varied climates, from coastal humidity to Highveld frost, stainless steel resists corrosion and requires little maintenance. Aluminium blades are lighter but bend under pressure in compacted soil. I have found that most serious gardeners settle on stainless steel for its balance of durability and ease.
Consider these options when choosing:
- Carbon steel: robust, needs oiling after use
- Stainless steel: rust resistant, ideal for wet conditions
- Aluminium: lightweight, suited for potting work
The right choice depends on your soil type and how often you dig.
Ergonomic Handle Designs for Comfort
The hand trowel claims its place among the 3 garden tools that matter most, yet the handle is where many gardeners fail to look. My own palm has known the sting of a thin metal core beneath cracked plastic. The better designs are anatomical, shaped to the fingers’ natural curl.
Angled shafts reduce the torque on your wrist during heavy digging. Soft grips dissipate pressure on the heel of your hand. The depth of the handle’s flange prevents your hand from sliding forward into the soil.
- Ribbed neoprene handles provide traction in wet winter mornings.
- Wooden handles weather beautifully but need regular oiling.
- Biomimetic curves mimic a clenched fist for reduced fatigue.
Try the handle with your glove on. A handle that feels fine in store can fail you after an hour of turning clay.
Planting Bulbs and Seedlings with Precision
A tulip bulb planted two inches too shallow rots before it blooms. The hand trowel, one of my 3 garden tools, makes this task reliable. Its narrow blade opens a hole without displacing soil. The edge cuts through clay and roots with a push.
I angle the trowel to gauge depth. I lower the bulb, then rock the trowel to close the soil void. Precision here means the seedling’s roots grip moisture, not air.
The trowel’s weight matters as much as its edge. A heavy handle transfers force downward, reducing the effort to penetrate winter soil.
For planting bulbs, the process remains deliberate:
- Sink the blade to the marked depth.
- Rock the handle forward to widen the bottom.
- Seat the bulb firmly, then release the soil.
Mastering the Pruning Shears
Bypass Versus Anvil: Making the Right Cut
One cut can determine a branch’s future. The choice between bypass and anvil shears is not trivial. Bypass blades slide past each other, cleanly slicing green wood. Anvil blades crush against a flat surface, better for dry, dead growth. For most tasks, bypass wins. But consider your specific needs. Here is a quick breakdown:
- Bypass: precise, healthy cuts for live stems.
- Anvil: leverage for tough, brittle branches.
I have seen too many gardeners ruin a rose bush with the wrong tool. The right cut depends on understanding this distinction. Among the 3 garden tools you own, pruning shears demand the most attention. Master them, and your plants will respond!
Maintaining a Razor-Sharp Edge
A dull blade does more damage than a rusty hinge. I watched a neighbour hack at a lemon tree with shears past their prime. The cuts turned ragged, inviting disease. Sharpening is not optional. It is the act that separates a tool from a paperweight.
I run a diamond file along the bevel at a ten degree angle, pulling toward the edge. Then I flip the blade and remove the burr with light strokes. A touch of camellia oil after wiping keeps moisture away. This care extends to the pivot bolt. Add a drop of oil when it catches. Twigs and sap push out of the joint during a squeeze.
This maintenance matters for all 3 garden tools, but the pruner demands it most because it works so close to living tissue. A sharp edge respects the branch. A clean cut heals faster and invites fewer pests.
Strategic Cuts for Optimal Plant Health
One clean cut at the right node can redirect growth for an entire season! I learned this while rehabilitating an old peach tree in Pretoria. The cut angle follows the branch, and I matched it.
When you prune, always cut just above a bud that faces outward. This pushes new growth away from the centre, opening the canopy to sunlight and air. With the 3 garden tools in your shed, the pruner is the one that touches living wood most often, so accuracy matters more here than brute force.
- A thinning cut removes an entire branch at its origin.
- A heading cut shortens a stem to a healthy bud.
- A renewal cut takes out older wood to spur fresh growth.
Each cut is a decision. The plant responds in kind, healing cleanly and setting fruit where you want it.
Common Pruning Mistakes to Avoid
In the hands of a gardener, a pair of pruning shears is not just a tool; it is a statement of intent. The difference between a well-tended garden and a chaotic one often lies in the discipline of the hand. When we rush, we commit errors that set the plant back for years, creating wounds that never properly seal.
The most frequent transgression is the stub cut, where the gardener leaves a section of dead wood above the bud. This invites disease and decay. Another error is cutting at a steep angle, which exposes a larger surface area to the elements. When you assemble your 3 garden tools, the pruner demands the most skill and patience.
To avoid these setbacks, consider the cardinal sins:
1. Cutting too close to the bud, damaging the dormant eye.
2. Using blunt blades that tear the bark instead of slicing it.
3. Pruning during wet weather, which spreads fungal spores.
I have seen people butcher a rose bush with a single, careless snip. The plant responds by sending out spindly growth that serves no purpose. A clean cut requires you to read the branch, to see where the energy flows. It takes seconds to do it right, but an entire season to undo the damage. Treat your shears with the same respect you afford a fine chef’s knife, and your garden will reward you with vigour I have seen in few other spaces.
The Versatile Garden Spade
Understanding Different Spade Designs
Some spade designs have existed, unchanged, for over a century. The Staffordshire pattern, with its distinctive treads, provides grip for the boot. This matters when you are slicing through the dense, root-laden soil of a winter garden. A flat, sharp edge cuts cleanly, whereas a rounded point is better for digging deep holes in softer ground.
The length and angle of the shaft also affect the force you can apply. A standard length suits most gardeners, but a shorter, angled handle offers more control for precise work. Consider the heavy clay of Gauteng versus the free-draining sands of the Cape. The digging spade excels in the former, while a lighter, sharper model is ideal for the latter.
When we speak of the 3 garden tools fundamental to any serious gardener, the spade is the cornerstone. Its versatility is unmatched, yet choosing the wrong design can turn a simple task into a laborious one. Consider the options available:
– The digging spade, featuring a deep, flat blade for turning heavy soil.
– The border spade, a smaller version for working in tight spaces around established plants.
– The transplanting spade, with a long, narrow blade designed to lift seedlings with minimal disturbance.
The nuances in design are not merely cosmetic. The curve of the blade’s shoulder dictates how much soil it can lift and how easily it releases. A steep shoulder holds more, but it demands more effort to eject the load. A shallow curve is self-cleaning in sticky earth. The choice, therefore, depends on the specific challenge your garden presents, not on a trend.
Proper Foot Placement and Body Mechanics
Planting your feet correctly turns the spade into a stable lever. Stand with your feet hip-width apart, one foot slightly forward, pressing the blade into the sod with a firm kick. Many gardeners attack the earth with their arms alone, but the legs do the heavy lifting. Let your body weight transfer through the shaft as you push down, then use your core to pull the handle back and lift the clod.
The rhythm becomes essential when you are working through compacted winter soil. The digging spade, one of the essential 3 garden tools for any serious gardener, works best when the blade enters the ground vertically. Stepping on the treads with the ball of your foot, rather than the arch, prevents strain and gives you the most mechanical advantage.
For tough roots, a slight backward tilt of the wrist pops the blade free. Keep your back straight and bend your knees; let the ground take the weight, not your spine.
Turning Soil and Breaking Ground Efficiently
A spade turns more than earth. It breaks the compacted crust that winter rains leave behind. The blade’s flat face lifts a clean sod, and the sharp edge severs roots before they fight back. For the dense clay found in South African gardens, the digging spade outperforms a fork. Its solid construction transfers force from the shoulders straight into the ground.
To break new ground efficiently:
- Choose a dry day. Wet clay sticks and exhausts the wrist.
- Sink the blade fully, then rock it backward.
- Lift the clod and let it drop. Do not fling it.
The process reveals the spade’s value as one of the 3 garden tools every gardener should own. A shallow first pass opens the soil, and a second pass crumbles it for planting. No other tool turns a bed this fast. We reach for ours first every spring!
Edging Beds and Creating Clean Borders
A clean edge between lawn and flowerbed is the quiet signature of a well kept garden. The spade, often eclipsed by its louder siblings in the shed, performs this task with surgical precision. One of the 3 garden tools that earns its place in the South African gardener’s arsenal, the spade’s flat blade is unmatched for creating sharp, defined boundaries.
The process requires a deliberate hand. Place the blade an inch deep into the turf and lever the sod back. The crisp cut stops the creeping kikuyu before it strangles your roses. A secondary pass, slicing vertically along the same line, gives you a trench that drains properly after a Highveld thunderstorm.
The spade does not merely carve; it maintains. A weekly trim along the edge keeps the line honest, reducing the need for harsh chemical edgers. This proactive approach preserves both the flowerbed and the lawn, a silent agreement between two green elements.
– The flat back of the blade creates a straight wall for the soil.
– A slightly angled cut promotes better water runoff.
– The sharp edge slices through runners without disturbing the roots of adjacent plants.
Each season, this simple act of edging defines the space, offering a visual order before the first flower even opens. It is a ritual of restraint, a promise of the careful work that follows.
Cleaning and Storing Your Spade
A spade left caked in clay is a spade that will betray you. The soil of the Cape Flats turns corrosive when left to dry on a steel blade. I rinse mine with a hard jet of water and let the sun do the rest! A quick scrape with a putty knife removes the stubborn bits. Once dry, I work linseed oil into the wooden haft and wipe the metal with an oily rag.
- Remove the dirt with a stiff brush before washing.
- Dry the blade thoroughly to prevent rust.
- Hang the spade off the ground to keep the edge safe.
The act takes five minutes but it extends the life of one of the 3 garden tools that works hardest for you. Rust will eat the edge if neglected. Keep the implement dry and it will keep its edge.
When to Replace a Worn-Down Blade
Every spade eventually betrays you. Not through rust, but through erosion. The Cape Flats sand grinds the steel edge down season after season. What was once a crisp cutting lip becomes a rounded paddle that bounces off compacted clay.
You will notice it in the legs first. A healthy spade takes a sharp push. A worn one demands stomping. Of the 3 garden tools that make up the average South African gardener’s essential kit, the spade is the one most likely to be worked past its useful life.
Replace the blade when you see:
- Visible thinning or dishing on the cutting face
- Deep pitting that resists grinding
- Wobble at the socket joint
That wobble is the final warning. A spade that flexes at the neck transfers energy into sideways motion, which ruins trenches and strains your back. A replacement blade costs less than a physiotherapy session, and yet many gardeners keep stomping. Of the 3 garden tools in the shed, this one deserves a retirement plan.
Essential Maintenance Routines
Cleaning Techniques for Longevity
Every gardener knows the grim feeling of a rusted hinge or a stiff pivot. The lifespan of your equipment depends on a routine that takes less than ten minutes after each session. I scrub the steel heads with a stiff brush to remove sap and clinging soil, because leaving dirt on the surface invites corrosion. For the pruner blades, I wipe them down with a cloth soaked in methylated spirits to dissolve the sticky resin from woody stems. A dry tool is a happy tool, so I always follow up with a clean rag to absorb any remaining moisture.
These 3 garden tools, the spade, the pruner, and the trowel, share the same fundamental needs. You can keep the moving parts in good order with a few simple actions:
- Lubricate the pivot points with a light machine oil
- Sand down any rough spots on the wooden handles
- Apply a thin coat of linseed oil to the metal surfaces
This maintenance routine prevents the slow degradation that comes from neglect. I find that paying attention to the small details, like the tension screw on the bypass pruner, makes the next session in the soil feel effortless. The investment of time is minimal, but the return on longevity is substantial.
Preventing Rust and Corrosion
Corrosion takes hold quickly when iron meets moisture. The 3 garden tools in my care, the spade, the pruner, and the trowel, all respond to the same preventative measures. I keep a tin of lanolin-based rust inhibitor on my workbench and work it into the steel heads every few weeks. This creates a breathable barrier that stops condensation from reaching the metal.
I also watch for early signs of oxidation. A faint orange haze on a blade edge signals the start of rust. My routine during the Highveld winter, when heavy frost adds moisture to the air, involves:
- Sanding down any rough patches with fine steel wool
- Reapplying the protective coating
- Checking the pivot points for trapped water
These 3 garden tools need this attention more frequently during wet seasons!
Sharpening Tools for Peak Performance
A dull blade punishes the gardener before it punishes the plant. I learned this through long seasons of forcing spades through stubborn Highveld clay, watching the steel bow where it should bite. My 3 garden tools now receive their sharpening at the same interval as the full moon, a habit born from necessity rather than superstition.
The pruner demands the finest edge, its bypass blade requiring a steady angle to slice cleanly through green wood. The spade wants a bevel that sheds soil without clinging to its face. The trowel, the quietest of the three, rewards a quick pass with surprising grace.
- The whetstone session lasts ten minutes, no more
- A thin coat of oil seals the freshly exposed steel
- A sheet of paper reveals the truth faster than any inspection
These 3 garden tools forgive neglect slowly, but they answer attention immediately. A sharpened edge transforms labour into something closer to ritual!