
Understanding Soil Cultivation Machinery
What Is a Rototiller and How Does It Work?
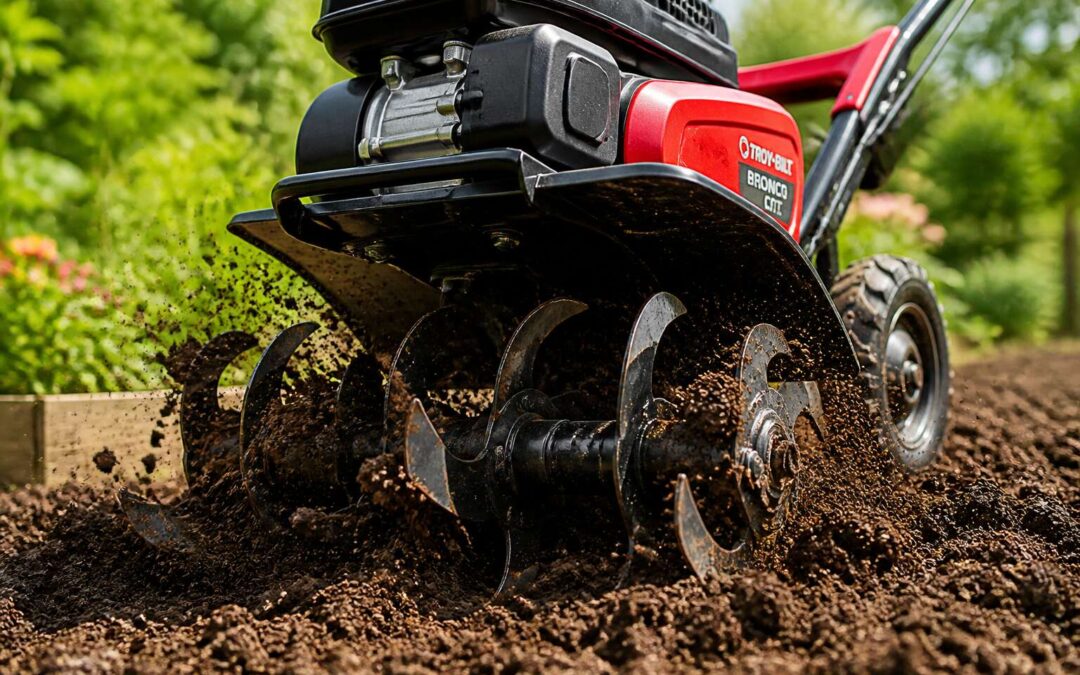
The rototiller is a noisy, vibrating beast. It is also the most direct way to settle a decades old disagreement between you and your soil. Consider it a mechanical earthworm on steroids. The primary function is simple: rotating blades chew into the ground, breaking up compacted dirt so you can plant without developing a chiropractor habit. This machine is the undisputed workhorse among garden tools tiller options, especially for those tackling a new plot or reviving a neglected one.
Power comes from the engine, which spins the tines. Those tines are the star of the show, and their configuration matters. You will find two main setups:
- Forward rotating tines, which pull the machine forward and are excellent for deep digging.
- Counter rotating tines, which dig in the opposite direction of the wheels, allowing for a more thorough pulverization of stubborn clods.
The depth adjustment is your best friend. Set it shallow for a quick surface fluff, or sink it deep to unearth rocks and old roots. A typical model will have a tilling width of about 16 to 24 inches, which sounds narrow until you remember the alternative is a manual fork. For heavy clay, you will need the heavier rear tine models, while a lighter front tine version is easier to manoeuvre in an established flower bed. In essence, it is a brute force solution, but it is the brute force that prepares your canvas for the garden you intend to paint.
Key Benefits of Mechanical Soil Aeration
In heavy South African clay soils, compaction can reduce root penetration by half. Mechanical soil aeration addresses this problem directly. A garden tools tiller breaks the compacted horizon without chemical amendments or hours of manual digging. Cultivation machinery achieves specific outcomes:
– Relieves soil compaction at depth
– Improves water infiltration and drainage
– Stimulates aerobic microbial activity
The mechanical action also incorporates organic matter into the root zone, which accelerates decomposition. Soil temperature and oxygen exchange improve immediately after tilling. I have watched water pool on compacted Gauteng lawns, then disappear after a single aeration pass. Aeration through a garden tools tiller restores the physical conditions roots require, and these benefits persist well beyond the initial effort. Oxygen penetrates deeper, microbial colonies expand, and rainfall moves through the profile rather than sitting on the surface. For South African gardeners facing dense soil, mechanical aeration remains the most direct intervention available.
Comparing Rototillers to Manual Tools
A man with a spade can turn over a metre of soil in an afternoon. A garden tools tiller can cover the same ground in minutes, but the comparison runs deeper than raw speed. Manual tools demand physical effort and reward patience. A fork or spade suits narrow beds where a machine cannot manoeuvre. Rototillers excel where the soil profile requires sustained, consistent disturbance across a larger surface.
The choice between machinery and hand tools often comes down to scale and soil condition. Consider what each approach offers:
– Manual implements allow precise control, letting you work around established root systems.
– They remain affordable and quiet, with no engine maintenance.
– Power-driven rototillers penetrate harder ground and stabilise soil structure at greater depth.
– They process organic material into the topsoil more uniformly.
Rotovators reduce the time spent on preparation. Manual tools build soil knowledge through direct tactile feedback. Both have a place, but the garden tools tiller becomes essential when time and physical limits shape the work. I recall a Johannesburg gardener who spent three weekends double-digging a new vegetable patch. A hired rototiller finished the same plot in one hour. For South African conditions, where summer rains arrive suddenly, the speed of soil preparation can define the planting season.
The distinction rests on what you are willing to trade. Muscle work clarifies the soil structure with every stroke. A rototiller sacrifices that tactile awareness for comprehensive results and a broader scope. Neither approach is universally superior, but recognising which one suits your land matters more than the debate itself. Cultivation machinery handles the heavy lifting; manual tools refine the details.
Common Landscaping and Gardening Applications
About 5% of South African gardeners own a powered soil cultivator, yet the machines dominate commercial landscaping contracts from Cape Town to Pretoria. That gap reveals something important about how cultivation machinery actually gets used. The garden tools tiller, in its various forms, has become the workhorse for tasks that spades and forks simply cannot handle at scale.
In landscaping, the primary application is site preparation before turf or planting. A crew clearing an old lawn needs to break up compacted ground, remove thatch, and blend in compost. A single pass with a rear-tine cultivator achieves what a dozen labourers would manage over several days. The machine churns the top 200 to 300 millimetres, leaving a uniform tilth that accepts grass plugs or seedlings without further intervention.
For vegetable production on smallholdings, the equation shifts. Rows of maize or beans require deep aeration to encourage root penetration during dry spells. The garden tools tiller performs this task more consistently than manual methods. It also incorporates crop residue from the previous season, speeding up decomposition before the next planting cycle.
1. Light-duty electric models suit domestic flower beds with loose, sandy soil.
2. Mid-range petrol tillers handle established vegetable patches with clay content.
3. Heavy hydraulic units are reserved for orchards and vineyards where compaction runs deep.
The maintenance angle matters too. Landscapers in the Highveld struggle with black turf soil that clings to tines. Regular cleaning and tine replacement become part of the workflow. Gardeners using a garden tools tiller for the first time often underestimate the vibration through the handles and the skill required to keep the machine tracking straight. With practice, the tool becomes an extension of the operator’s intent, turning stiff earth into manageable growing medium.
Urban farming initiatives in Johannesburg have adopted these machines to reclaim vacant lots. The equipment transforms neglected ground into productive plots within hours. That speed changes the calculus for community projects where volunteer labour fluctuates. A garden tools tiller removes the bottleneck that manual cultivation creates.
Choosing the Right Machine for Your Property
Front-Tine vs Rear-Tine Designs
Choosing between front tine and rear tine designs often comes down to the square metres you intend to break. A front tine machine suits a modest vegetable patch, while a rear tine unit handles compacted clay with less strain on your arms. I have watched gardeners wrestle with the wrong tool, and the difference is immediately visible.
Consider the soil type and the depth of existing roots. Loose, sandy ground does not demand rear tine power, but heavy Transvaal soil does. The physical layout matters too:
- Front tine models are lighter and easier to manoeuvre around shrubs.
- Rear tine designs pull themselves forward, reducing fatigue on long rows.
That distinction becomes obvious after thirty minutes of work. Your garden tools tiller should match the terrain, not the other way around.
Electric, Gas, or Cordless: Which Powertrain Fits Best?
South Africa’s loadshedding schedule should influence your choice of garden tools tiller power source. A petrol engine ignores the grid entirely. An electric model requires stable electricity, which many suburbs cannot guarantee.
Consider the distance from your wall socket. Extension cords limit your range and create tripping hazards. Cordless units offer freedom but demand battery investment. The physical weight changes too.
- Petrol machines deliver raw torque for stubborn soil.
- Electric models run quietly in enclosed spaces.
- Cordless options suit compact plots without fuel storage.
The powertrain alters how the machine handles, how it sounds, and how much maintenance it demands.
Assessing Soil Type and Lot Size
Soil composition in South Africa varies dramatically, even within a single province. The dense red clay of Mpumalanga behaves nothing like the free-draining sands of the Western Cape. Your garden tools tiller must match that ground or it will fight you from the first turn.
Walk your property before buying anything. Press a spade into the earth in several spots. Feel for resistance. Look at how water pools after rain. A plot that stays soggy demands different tine action than one that dries to brick by noon.
- Heavy clay require slower tine speeds and higher torque.
- Loamy garden soil works with almost any standard unit.
- Rocky or root bound ground calls for serrated tines.
Lot size shapes your practical choices as much as the soil itself. A 200 square metre backyard in Johannesburg needs something nimble and easy to store. A one hectare smallholding in Limpopo means you will spend hours in the field, so operator comfort and fuel capacity become critical. I have watched buyers choose their garden tools tiller based on horsepower charts alone, only to discover the machine cannot handle the physical realities of their land.
Weight, Durability, and Ergonomic Considerations
Weight dictates whether a garden tools tiller becomes a reliable partner or a back-breaking liability. A 40 kg machine in the showroom feels different after an hour on Durban clay. Manufacturers list dry weight, not the fuel and vibration you carry with it. For smaller properties, a lighter unit lets you finish without fatigue. For larger plots, extra mass provides traction, but only if the handles absorb the shock.
Durability shows in the tine metal and gearbox housing. Cast iron cases outlast stamped steel. Sealed bearings keep out the abrasive sandy soils common in the Free State. Check the handles. Thin tubular steel flexes and eventually snaps.
- Adjustable handles reduce strain for taller operators.
- Anti-vibration mounts protect your wrists.
- Wheel kits ease transport on uneven ground.
Ergonomics matters more than horsepower. A garden tools tiller that forces you to hunch or grip tightly will sit unused in the shed.
Useful Attachments and Add-Ons
Every property presents its own peculiarities. A garden tools tiller suited to a flat one hectare plot in Gauteng may struggle on a sloped smallholding in the Cape. Match the machine to the actual ground you work, not the dream version of it. If you rotate vegetable beds monthly, a compact rear tine model with adjustable working width will serve better than a wide, fixed unit. I have learned this the hard way!
Attachments extend usefulness without buying a second machine. Consider what fits your routine:
- Furrowers for planting potatoes or onions
- Edger attachments to keep borders sharp
- Transport wheels for moving between beds
An implement with interchangeable parts becomes a year round asset. It adapts as your garden evolves, saving you from a second purchase. That is the quiet luxury of a well chosen machine.
Budgeting for Your Purchase
Buying a garden tools tiller without first measuring your property is a gamble. I have seen homeowners buy a compact tiller for a rocky half hectare and wonder why the tines bounce. Others overspend on a heavy rear tine model for a small vegetable patch, then park it in the garage because it is a chore to start.
The slope, soil density, and obstacles each demand attention:
- The gradient of every working strip
- The distance between garden beds and storage
- The moisture level of your soil in winter
Your budget should cover the machine, but also the inevitable extras: replacement tines, a service kit, and fuel or batteries. A R4,000 garden tools tiller that needs R2,000 of repairs in six months is not cheaper than a R7,000 unit built to last.
Mastering Tilling Techniques
Preparing the Planting Bed
The difference between churning soil and cultivating a proper planting bed comes down to timing and patience. A garden tools tiller still depends on you to read the ground. If the soil clings to your boots, you are tilling too wet. If it turns to dust, you are tilling too dry.
Find the sweet spot where the earth crumbles gently. Work in parallel passes, overlapping each run by half the machine’s width. Let the tines pull you forward rather than forcing the handles down.
Common mistakes that undermine your prep work:
– Tilling deeper than the natural soil profile, which drags sterile subsoil upward
– Making repeated passes in one session, which destroys the structure you want
– Ignoring moisture levels at different depths, not just the surface
Proper bed preparation means knowing when to stop. Your garden tools tiller handles the mechanical work, but the judgement remains yours.
Setting Optimal Tine Depth and Overlap
Setting the tine depth on your garden tools tiller is an exercise in restraint. The tines should slice only the topsoil, never plunging past the layer of organic richness. Shallow depth preserves the microbial life that aerates the earth through its patient labour.
Overlap follows its own arithmetic. Align each pass so the edge of the previous furrow sits at the midpoint of the next. This removes the risk of untilled strips breaking the bed’s uniformity.
- Depth errors reveal themselves as hard pans beneath the tilled layer
- Uneven overlap leaves islands of unmoved earth
- Tine marks that spray outward signal excessive speed
Reading the machine’s response tells you what the soil cannot say aloud. The tiller obeys those who treat depth and overlap as one continuous motion.
Navigating Curved Beds and Tight Corners
Curved beds resist the straight-line habits most operators develop. A garden tools tiller turns differently when the front wheels pivot against compacted edges. Slow the ground speed before entering the bend, then let the tines pull the machine forward while you guide the handlebar gently.
Tight corners require a different approach. Lift the tines slightly, pivot the rear end, and lower the tines again. This prevents gouging the grass verge or leaving a crescent of untouched soil.
Here is a sequence that works well:
- Throttle down before the curve.
- Angle the handlebar into the turn.
- Keep the tines engaged but shallow.
- Complete the arc with a straight finishing pass.
Each curve becomes a series of deliberate adjustments. The machine responds to small inputs, not forceful corrections. Respect the turning radius and your garden tools tiller will trace the bed’s shape without tearing the edges.
Timing Your Tilling for Soil Health
Timing transforms a garden tools tiller from a brute-force implement into a precision instrument. In South Africa, the autumn rains create a narrow window when soil moisture sits near 50 percent of field capacity. Work the ground too early and the tines smear clay into impermeable slabs. Wait too long and the soil turns to powder that resists aggregation. The crumble test remains the most reliable gauge. Take a handful of soil, squeeze it, then poke the ball. If it breaks apart cleanly, the timing is right.
Three markers usually align when the moment is favourable:
- Soil temperature above 12 degrees Celsius at 10 cm depth
- No standing water after a light rain
- Earthworms visible in the top layer
Tilling when the soil biology is active allows the garden tools tiller to mix organic matter without destroying fungal networks. Each pass works with the soil’s natural rhythm rather than against it.
Managing Rocks, Roots, and Hardpan Layers
Rocks, roots, and hardpan layers change how a garden tools tiller behaves in the field. Each obstacle requires a different response. Adjustable depth settings allow you to lift the tines over rocky patches instead of burying them. Wiry roots wrap around rotating tines and stall the engine. Stop, clear the debris, and continue.
Recognise the signals before committing:
– A metallic clink indicates buried stone
– A sudden lurch means the tines caught a root
– A rising engine whine points to hardpan resistance
Hardpan layers demand patience. Shallow passes at increasing depth break the compacted zone without straining the machine. A garden tools tiller works best when you read the ground and adjust in real time. The soil in many South African gardens carries a mix of all three, so expect to switch tactics within a single row.
Maintenance and Longevity
Post-Use Cleaning and Proper Storage
A tiller left caked in soil after a hard afternoon’s work will punish you later. Moisture trapped against the tines and engine housing accelerates rust and corrodes cables. While a power washer is tempting, it forces water into bearings and seals. Use a stiff brush and a putty knife to remove packed dirt and plant matter. Pay special attention to the area around the gearbox, where debris collects and hardens.
Once the undercarriage is clean, wipe down all metal surfaces with an oily rag. This light film protects against the humid coastal air common in KwaZulu-Natal and the highveld’s summer storms.
Proper storage begins with the fuel system. Ethanol blends degrade quickly, so run the engine dry or add a stabiliser before parking the machine. For electric models, remove the battery and store it indoors away from concrete floors. Follow this short checklist before the tiller sits for the season:
1. Inspect belts and tines for wear.
2. Grease all fittings and pivot points.
3. Check the air filter and clean or replace it.
4. Tighten any loose hardware.
A garden tools tiller represents a significant investment. In South Africa, where replacement parts can take weeks to ship, protecting that investment through diligent aftercare ensures the machine remains ready for spring planting. Keep the machine under a tarp or in a shed, sheltered from direct sun which dries out rubber components. This maintenance becomes a quiet ritual, a small price for ground that turns easily when you need it most.
Sharpening and Replacing Tines
The tines of a garden tools tiller endure more abuse than any other component. Each rotation grinds against stones, roots, and the dense clay that characterises parts of Gauteng and the Lowveld. Dull edges force the engine to work harder, churning soil instead of cutting it. This strain shortens the life of the gearbox and the belt.
Sharpening is best done with an angle grinder and a flat file. Remove each tine, clamp it securely, and follow the original bevel. Over time, tines lose material and develop rounded corners. When the cutting edge no longer cuts into hard ground, replacement becomes a safety issue. A worn tine can snag on rocks and jerk the machine unexpectedly.
- Check for cracks near the bolt holes
- Measure the edge width against a new tine
- Inspect for bent shafts that cause vibration
Replacing all tines simultaneously maintains balance. Mismatched pairs create uneven depth and punishing feedback through the handles. For the South African gardener, sourcing replacement tines locally often takes a week or two. A spare set of bolts reduces downtime during the summer planting rush.
Engine Care and Fuel Management
One South African study found that nearly two thirds of small engine failures trace back to fuel neglect. It is a silent killer. For a garden tools tiller, the engine is the soul, and yet it often receives the least attention until the moment it refuses to start. Petrol left in the tank over the Highveld winter turns to a gummy varnish that clogs the carburettor jets. The fix is never quick, and it always costs money you did not plan to spend.
Fuel management starts with fresh petrol. Look for the 95 octane unleaded at the pumps and avoid mixing oil into the tank unless you own a two stroke model. These machines run lean and hot, so the fuel line and filter deserve an annual inspection. Ethanol blends absorb water from the humid Durban air, which leads to corrosion inside the float bowl.
Drain the carburettor if the tiller will sit for more than a month. Turn the fuel tap off and run the engine until it stalls, which empties the bowl naturally.
1. Remove the air filter cover and check for dust ingress.
2. Inspect the fuel lines for cracks or soft spots.
3. Replace the spark plug every hundred hours of use.
4. Torque the head bolts after the first twenty hours of operation.
Engine oil gets brittle in extreme heat. Use a 10W 30 grade that meets the API SJ rating or higher. Change it after the first five hours on a new machine, then every fifty hours after that. The oil you drain will tell you the health of the internals. Metal flakes mean bearing wear. A milky texture means water has entered the crankcase, which usually points to a failed head gasket or washing the engine with a pressure hose.
Air filters on a garden tools tiller work harder in the dry Northern Cape wind, where dust storms turn the air into sandpaper. Clean the foam pre filter with warm soapy water after every use near the Vaal River or other sandy patches. Never use compressed air on a paper filter element. That simply forces the dirt deeper into the fibres.
A well maintained engine starts on the first pull, even after months in storage. It runs smoothly at full throttle and idles without hunting. When the machine begins to stall under load despite a fresh tank, check the fuel cap vent. A clogged vent creates a vacuum that starves the engine of petrol. This single issue causes more frustration than any mechanical failure, and yet the fix takes five seconds with a piece of wire.
The tines might do the visible work, but the motor carries the burden. Treat it with the same care you give a good hunting rifle or a beloved bakkie. It will repay you with decades of faithful service, turning tough African soil into a bed ready for planting.
Safety and Ergonomics
Essential Protective Equipment
The roar of a petrol engine masks a quieter threat. Vibration from a garden tools tiller travels through the handles, into wrists, elbows, and shoulders. Without proper damping, a morning of tilling can leave your forearms humming for hours. I always wear padded gloves, not for comfort alone, but for the barrier they create between machine and body.
Protective equipment goes beyond gloves. Consider your ears and eyes. A tilling session kicks up dust and stones that ricochet with surprising force. Hearing protection is non-negotiable when running gas models for extended periods. For electric units, the noise lessens, but the debris does not!
- Safety glasses with side shields
- Anti-vibration gloves with padded palms
- Ear muffs or foam earplugs
Sturdy boots complete the kit. Steel toes guard against slipped tines, while lug soles keep you stable on soft ground. A garden tools tiller rewards respectful handling.
Safe Operation on Slopes and Uneven Terrain
The true test of a garden tools tiller seldom happens on flat, forgiving plots. It happens where the ground falls away, where old tree roots hump beneath the surface, or where the soil has settled into a stubborn, uneven hardness. A slope changes the machine’s temperament. Gravity becomes a force you manage, not merely a constant you ignore. On a hillside, the tiller wants to run downhill, and the tines that churn soil on level ground can suddenly dig deeper or glance off a stone, jolting the handlebars sideways.
Your posture is your primary tool on such terrain. Stand to the side of the machine, not directly behind it, and let your arms act as guides rather than anchors. Bend your knees to absorb the machine’s pitch. If the slope feels too severe, start with a shallow pass, barely breaking the crust, then deepen the cut on the next round. Pushing a rear-tine model uphill requires patience; pulling a front-tine model downhill demands real caution.
The choreography changes when you cross an obstacle:
1. Approach roots and rocks at a perpendicular angle, never a steep diagonal.
2. Lift the handlebars slightly to let the tines ride over the obstruction, never forcing them down.
3. If the tiller bucks or stalls, kill the engine before you try to free it.
4. Walk the perimeter first. A visible dip in the grass often marks a buried rock.
Uneven terrain also shifts your weight unexpectedly. A dry ditch, a hummock of old grass, or a patch of soft sand can drop a wheel suddenly, throwing the machine off-balance. Keep your grip firm but relaxed, and always work with a partner within earshot on remote properties. The quiet dust of a Karoo afternoon or the red soil of a KwaZulu-Natal hillside rewards a steady hand. It is a slow, deliberate dance between operator and machine, and the yield is a bed that remembers your care.
Underground Utility and Debris Awareness
One in five tiller repairs begins with a buried surprise. Before your garden tools tiller earns its keep, know what lurks below. Utility lines, irrigation pipes, and forgotten builders’ rubble all wait in ambush. A call to the local utility locator is free. Walking the plot for repair patches, valve covers, or suspicious dips takes a minute.
The ground often lies. A neat lawn may hide old fence wire or a shattered flowerpot. Shallow test holes along your planned path expose the truth before the tines do. Striking something solid demands a stop, never a forced push through a clunk. That crunch might be a clay pipe or a fibre-optic line. Your shoulders and back matter. Lifting the machine using your legs and setting the handlebars at waist height keeps the work from punishing you. Letting the tines do the pulling makes for a steady, slow pass.
Minimizing Vibration and Operator Fatigue
Every time I fire up a garden tools tiller, I feel the vibration travel from the handles into my forearms. It is a persistent, low-grade punishment that many operators shrug off until their hands go numb mid-row. Health researchers call it hand-arm vibration syndrome, and it affects a startling number of weekend gardeners and commercial landscapers alike.
The engineering inside the machine matters enormously. Anti-vibration mounts, cushioned grips, and well-placed handles interrupt that energy before it reaches your skeleton. But your body plays a role too. A rigid stance with locked elbows sends every jolt straight through your spine. Relaxed knees and a soft grip let the tines do the pulling while your muscles stay loose.
Fatigue compounds quickly. Tired shoulders make you grip harder. A harder grip increases vibration exposure. More vibration means faster exhaustion. The right garden tools tiller, sized to your strength and the soil you face, stops this cycle.